
Embedding elements
You can inline embed your elements into your website in a few different ways. You can directly embed just using the element id, or you can use an embed zone that can dynamically change the element based on the Goalu ser flow.
This section is more intended for anyone who has worked with HTML before, you will need this knowledge to embed these types of elements
To embed an element into your website, you can add the following code to your webpages. Ensure you change ELEMENT_ID to the actual identifier of your element. More explained below on how to find it.
<div data-embedery-inline-id="ELEMENT_ID"></div>
For this to work, please ensure you also have Embedery installed on your website.
Finding the widget id
To find the element id, check the element editor URL, it will look something like:
https://embedery.com/a/GOAL_ID/engage/inweb/ELEMENT_ID/editor
Your element id will be the ELEMENT_ID shown above.
So if we wanted to embed this element into our website, the HTML code would look like:
<div data-embedery-inline-id="ELEMENT_ID"></div>
How they work with goals
Elements are the approach we take to engage with users, they can be conditionally shown depending on the user flow of your goal. For your element to work inside a goal, you can either show the element as a popup, or you can use an embed zone.
Embed zones
Embed zones are a simple way to show your elements on your website. They can dynamically change the element based on user properties or how your user interacted with previous steps in your user flow.
An embed zone is best suited in your website sidebar or in a shared area throughout your pages.
You can use the embed zone of recommending products on certain pages or by encouraging a user action. They will appear inline with the rest of the webpage and seem like it belongs with the rest of the content.
How it works with goals?
Goals are used to help make your website more efficient by helping your achieve conversion goals, with an embed zone, depending on the stage of the goal, the embed zone can dynamically change the shown element.
So if you want to drive more visitors to your Twitter account for example, the action may decide to display a button to your Twitter account inside your embed zone. Once the element in the embed zone has been interacted with, the embed zone may change back to its default element.
How do I install an embed zone?
So to install an embed zone you may need some basic techincal skills on how HTML works.
But its quite straight forward.

You will need to register the embed zone with your property. To do so go to app.embedery.com, click on properties in the bottom left of the sidebar, then embed zones and create a new one.
In the modal, give the zone a name and click create.
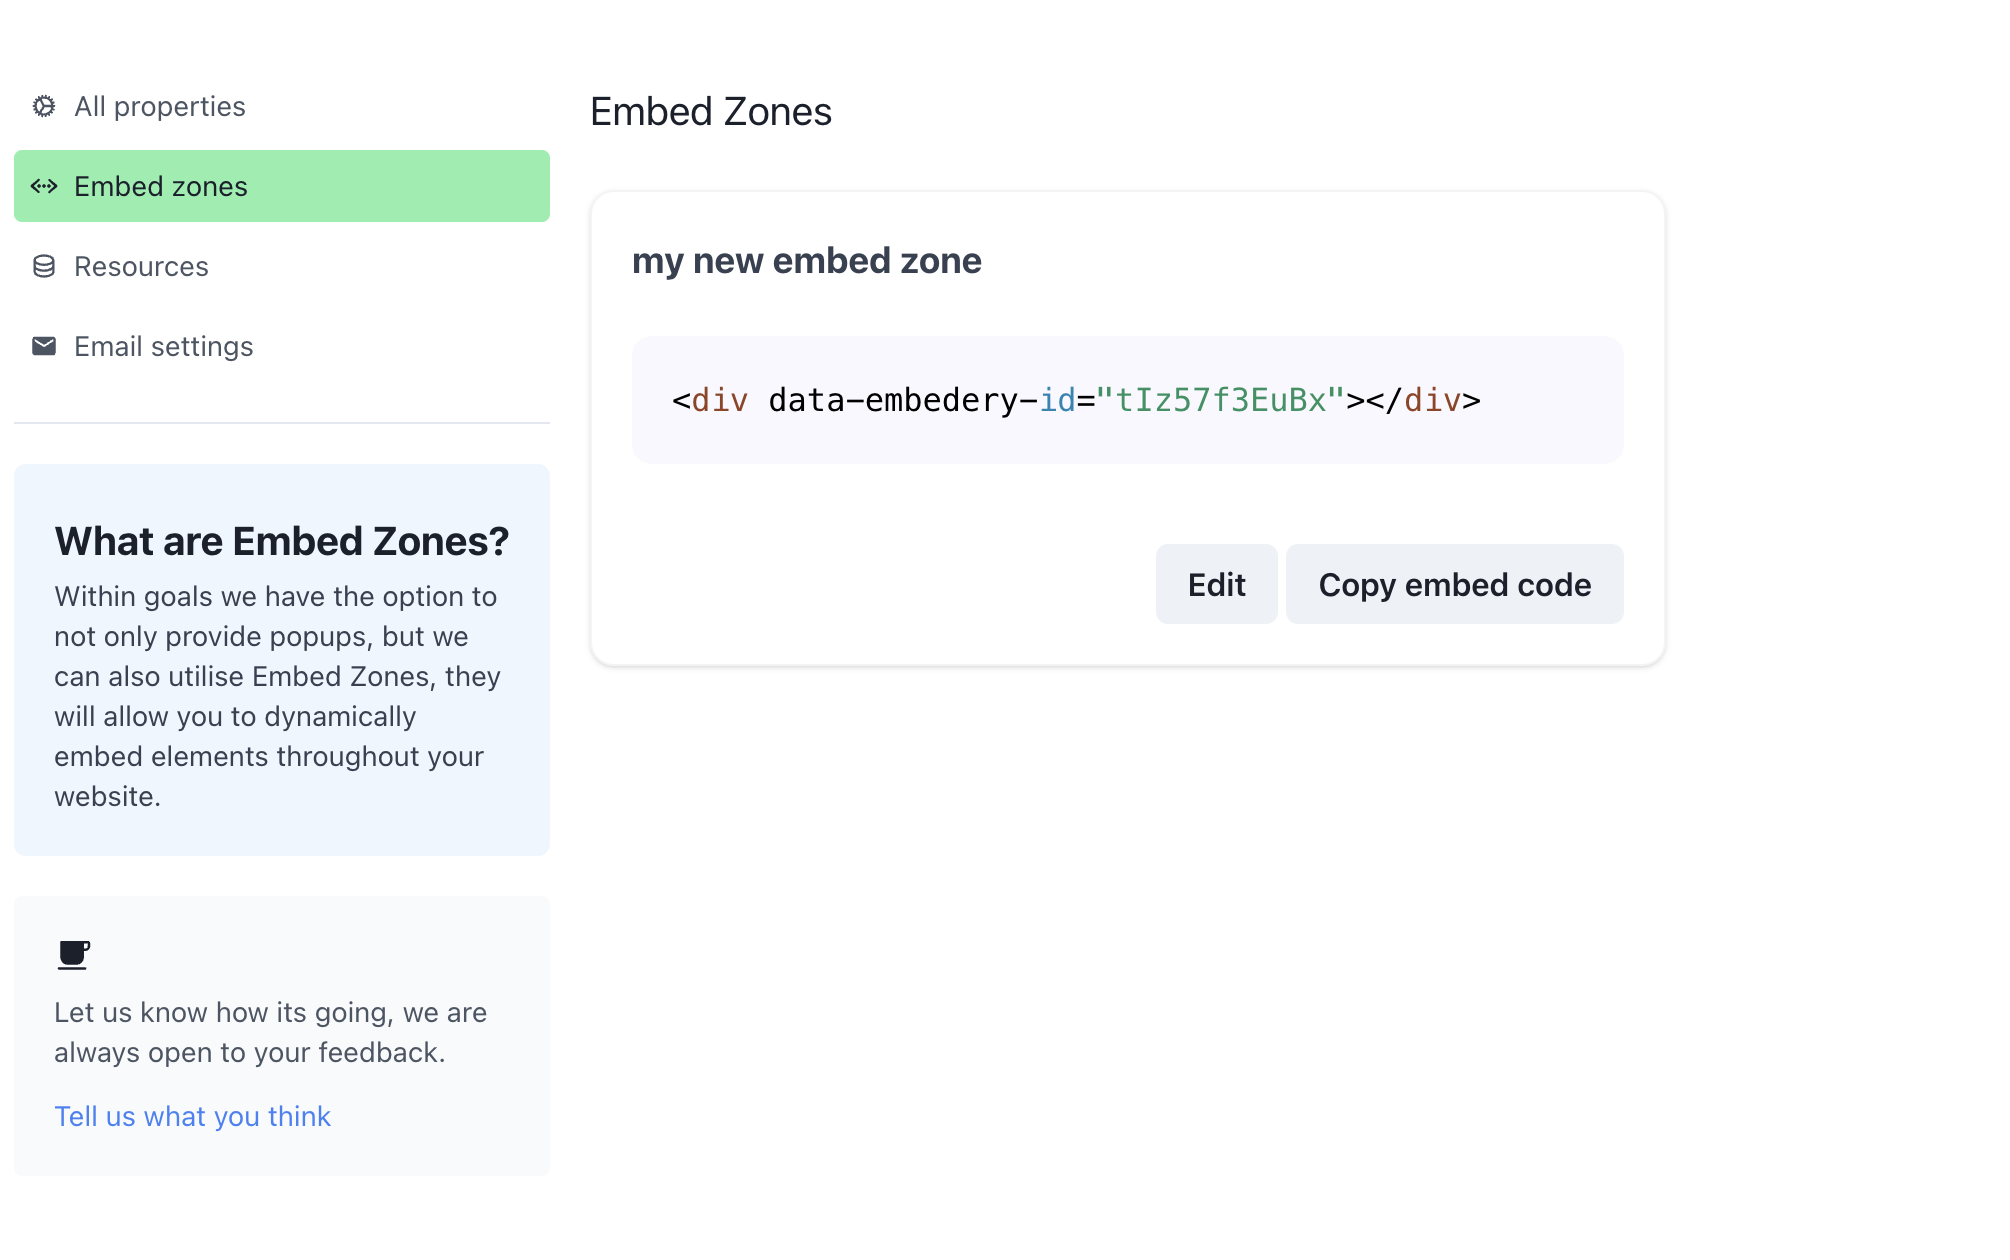
This will provide some example HTMl, you can use with your webpage along with the needed embed zone identifier.
Simply add the following HTML code to your webpage with the embed zone identifier:
<div data-embedery-id="EMBED_ZONE_ID"></div>
And thats it.
My issue is still not resolved.
We are sorry to hear that you have not found the appropiate documentation to help solve your problem.
Please reach out to us and we will do our best to help.